Installing an infrared sauna at home is more straightforward than most people expect. Unlike traditional saunas that often require professional electrical work and permanent construction, most infrared models are designed for DIY assembly and plug into standard household outlets. This guide covers everything you need to know — from choosing the location to your first session.
Before You Begin: Planning Checklist
Before your sauna arrives, complete these planning steps:
1. Choose Your Location
The right location balances convenience, privacy, and practical requirements. Consider these options:
For the full home sauna framework including cabin selection, electrical specs, and the indoor-vs-outdoor decision matrix, see our home infrared sauna setup and buying guide. The dedicated room-by-room placement guide compares spare bedroom, basement, bathroom, garage, and walk-in closet installs in detail.
Spare Bedroom (Easiest Option)
- Climate-controlled environment
- Private and quiet
- Easy access to bathroom/shower
- Simple electrical (standard outlet usually sufficient)
- Considerations: Ensure adequate ventilation to prevent room humidity buildup
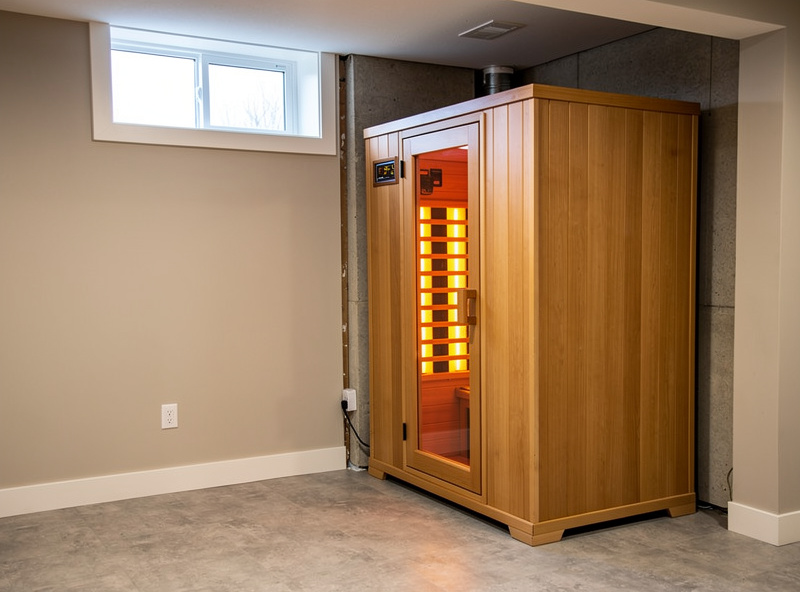
Basement
- Cool ambient temperature enhances sauna performance
- Usually ample space
- Floor can handle weight
- Considerations: May need dehumidifier in the room; verify ceiling height (7+ feet); ensure adequate electrical circuit
Bathroom
- Ultimate convenience for pre and post-shower
- Existing ventilation (exhaust fan)
- Water-resistant flooring already in place
- Considerations: Space often limited; moisture management critical; ensure GFCI protection on outlets
Garage
- Does not take up living space
- Easy to ventilate
- Considerations: Must be insulated and climate-controlled for year-round use; concrete floor may need mat for comfort; ensure proper electrical capacity
For a direct cost-and-comfort comparison between a spare bedroom and a garage install — including the preheat penalty, insulation requirements, and moisture management each demands — see the indoor vs. garage infrared sauna guide.
Outdoor Covered Patio
- Natural setting for sauna experience
- No impact on indoor space
- Considerations: Requires weather-resistant sauna model; may need permits; electrical run from house; privacy screening
For a full walkthrough of cabin selection, foundation specs, electrical code, and weatherproofing for outdoor placement, see our outdoor infrared sauna setup and buying guide. The foundation, power, and permits guide covers the NEC code-compliant electrical run from your panel to the cabin location.
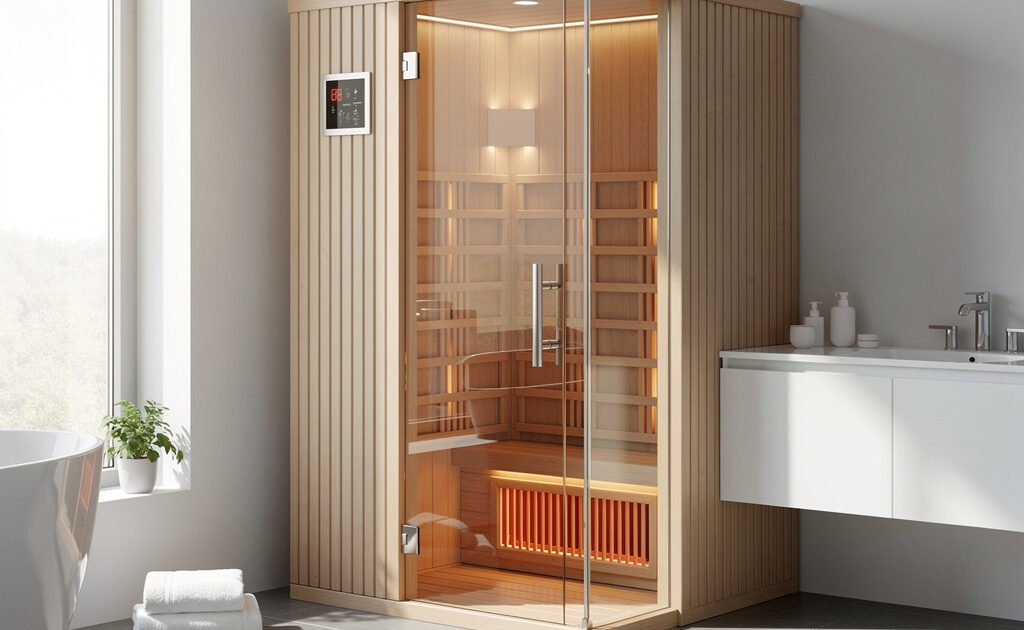
2. Measure Your Space
Sauna dimensions on manufacturer websites typically show exterior dimensions. You need additional space for:
- Clearance from walls: Minimum 4-6 inches on all sides for ventilation and heat dissipation
- Door swing: Ensure the door can open fully without hitting walls or furniture
- Entry path: Measure doorways, hallways, and stairs along the delivery route to ensure sauna panels will fit
- Ceiling height: Minimum 7 feet recommended for comfortable headroom
- Floor loading: Standard floors handle 1-2 person units; larger units may require verification of floor capacity
Example space calculation for a 2-person sauna:
- Sauna exterior: 48″ wide × 44″ deep × 77″ high
- Add clearances: 6″ on all sides
- Total space needed: 60″ × 56″ (approximately 5ft × 4.7ft footprint)
3. Verify Electrical Requirements
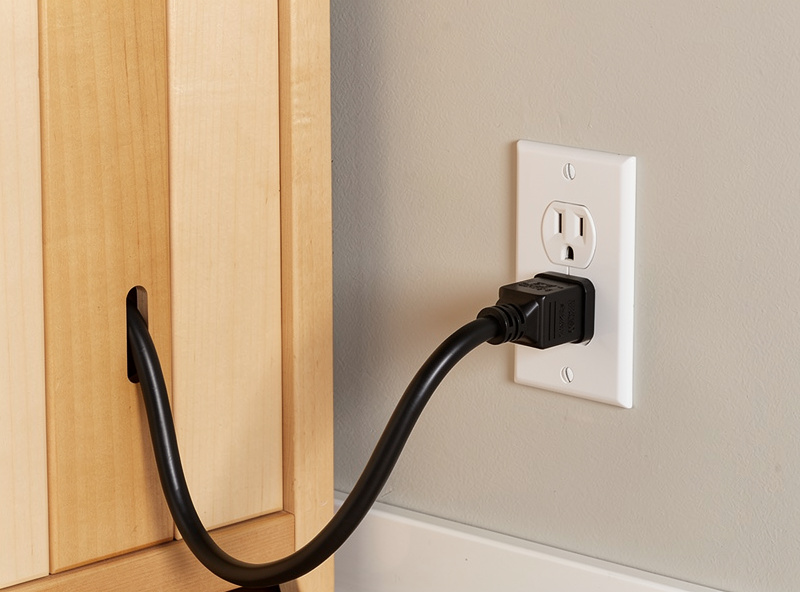
Most 1-2 person infrared saunas (see budget options under $1000) use standard 120V, 15-amp household outlets. Larger units may require 240V. The wiring and outlet guide covers amperage, GFCI placement, and dedicated-circuit details for both voltages in more depth than the summary below.
120V Units (Most Common)
- Standard household outlet
- 15-amp circuit required
- Dedicated circuit preferred (no other devices on same breaker)
- Extension cords not recommended
240V Units (Larger Saunas)
- Requires dedicated 240V circuit
- Professional electrician installation necessary
- May require electrical panel upgrade if insufficient capacity
- Cost: $500-2,000 for professional installation
Electrical Safety
- GFCI protection recommended, especially in bathrooms or damp locations
- Never use adapters to fit plugs into incompatible outlets
- If circuit breaker trips during use, consult an electrician
4. Plan Your Flooring
Saunas require level, stable flooring. Considerations by floor type:
Hard Flooring (Tile, Concrete, Hardwood)
- Ideal for saunas
- Use a mat under the sauna unit to protect flooring and provide stability
- Sweat and moisture can damage unprotected wood floors over time
Carpet
- Not recommended directly under saunas
- Moisture and heat can damage carpet and create mold risks
- If carpet is your only option, place a waterproof barrier (plastic sheeting) plus rigid platform under sauna
Concrete Slab (Basement/Garage)
- Excellent stability
- Use rubber mat or sauna-specific floor grid for comfort and air circulation
- Cold concrete can reduce initial warmup time slightly

Delivery and Assembly
Receiving Your Sauna
Most infrared saunas ship in 2-4 boxes via freight delivery:
- Inspect upon delivery: Check for visible damage to boxes before signing; document any concerns with photos
- Weight considerations: Boxes typically weigh 100-250 lbs each; have help available for moving
- Storage: If not assembling immediately, store boxes in a dry location; avoid extreme temperature fluctuations
Assembly Process (1-2 Hours)
If you have not purchased yet, see our buying guide. Most infrared saunas use modular panel systems that snap or screw together. General process — for the panel-by-panel version with every buckle and clip called out, see the infrared sauna assembly steps guide:
Step 1: Unboxing and Inventory (20 minutes)
- Unpack all components
- Check against parts list in manual
- Verify all hardware is present
- Identify each panel (they are usually labeled)
Step 2: Floor Panel Setup (10 minutes)
- Position floor panel in final location
- Use level to ensure it is flat (shim if necessary)
- Place waterproof mat underneath if desired
Step 3: Wall Assembly (30-45 minutes)
- Attach side panels to floor (usually tongue-and-groove or screw connections)
- Install back wall panel
- Connect front wall with door opening
- Verify walls are square and plumb
- Most manufacturers recommend 2 people for this step
Step 4: Heating Panel Installation (20 minutes)
- Mount carbon or ceramic heating panels to interior walls
- Connect wiring according to manual
- Ensure all connections are secure
- Do not power on until fully assembled
Step 5: Bench and Interior Features (15 minutes)
- Install bench(es)
- Mount backrests if included
- Install interior lighting
- Add any accessories (towel hooks, magazine rack)
Step 6: Door and Roof (15 minutes)
- Hang door and verify smooth operation
- Check door seal for proper closure
- Install roof panel
- Secure all final fasteners
Step 7: Control Panel and Electrical (10 minutes)
- Mount exterior control panel
- Make final electrical connections
- Double-check all wiring before first power-on
Professional Assembly Option
If DIY is not for you:
- Some manufacturers offer white-glove delivery and assembly (additional $200-500)
- Local handyman services can often assemble saunas ($150-300)
- Some retailers partner with local assembly services
Ventilation Requirements
Contrary to traditional saunas, infrared saunas require minimal ventilation because they do not heat the air to extreme temperatures. However, some airflow is still important — the dedicated infrared sauna ventilation guide covers passive and active options in more depth than the summary below:
Room Ventilation
- Crack a window or run exhaust fan if the room becomes humid during use
- Allow sauna to air out between sessions (leave door ajar)
- Do not enclose sauna in airtight closet or cabinet
Sauna Interior Ventilation
- Most infrared saunas have small vents near the floor or ceiling
- Do not block these vents
- Some users prefer to leave the door slightly cracked during sessions for fresh air
Post-Session Ventilation
- Wipe down surfaces after use
- Leave door open for 15-30 minutes to air out
- Run exhaust fan in the room if available
First Use: Breaking In Your Sauna
New saunas (whether near, far, or full spectrum) should be “burned in” before first personal use:
Why Break-In Is Necessary
- Heating elements may have manufacturing residue
- New wood may have slight off-gassing
- Eliminates any shipping or storage odors
Break-In Procedure
- Assemble sauna completely
- Remove any plastic wrapping or protective materials
- Plug in and power on
- Set temperature to maximum
- Run for 45-60 minutes with door closed
- Air out thoroughly afterward
- Repeat once if any odors remain
Initial Testing
Before extended personal use:
- Test that control panel functions properly
- Verify heating elements warm evenly
- Check that temperature reading is accurate (use separate thermometer)
- Ensure door latches and seals properly
- Test any electronics (lights, speakers, etc.)
Operating Your Sauna
Pre-Session Preparation
- Hydration: Drink 16-20 oz of water before entering
- Timing: Wait 1-2 hours after eating; empty bladder
- Clothing: Light cotton clothing or towel only; avoid synthetics
- Shower: Some users prefer to shower before to open pores; others prefer to enter dry
- Remove: Jewelry, watches, glasses (heat can damage some materials)
Heat-Up Time
- Turn on sauna 10-15 minutes before your session
- Set temperature to your target (beginners: 120-130°F; experienced: 140-150°F)
- Enter once temperature reaches target
- Some users prefer to enter during heat-up for gradual acclimation
During Your Session
- Positioning: Sit so heating panels face your body; rotate periodically for even exposure
- Hydration: Bring water into sauna; sip regularly
- Duration: Beginners: 15-20 minutes; Experienced: 30-45 minutes
- Entertainment: Many saunas include Bluetooth speakers; meditation or quiet time also popular
- Listen to your body: Exit if you feel dizzy, nauseous, or uncomfortable
Post-Session Routine
- Cool down gradually: Sit for 5-10 minutes at room temperature before showering
- Shower: Rinse sweat from skin; lukewarm water better than cold
- Rehydrate: Drink 16-24 oz of water; consider electrolytes for longer sessions
- Rest: Allow 15-30 minutes before intense activity
- Moisturize: Apply lotion to skin after cooling down
Running Cost Calculations
Understand what your sauna costs to operate:
Electricity Cost Formula
Monthly Cost = (Wattage ÷ 1000) × Hours per Month × Electricity Rate
Example Calculation
For a 1,800-watt sauna used 4 times per week (30-minute sessions) at $0.13/kWh:
- Per session: 1.8 kW × 0.75 hours = 1.35 kWh
- Per week: 1.35 kWh × 4 = 5.4 kWh
- Per month: 5.4 kWh × 4.3 weeks = 23.2 kWh
- Monthly cost: 23.2 kWh × $0.13 = $3.02/month
Real-world estimates by sauna size:
- 1-person (1,500W): $10-15/month with regular use
- 2-person (1,800W): $12-18/month
- 3-4 person (2,500W+): $18-30/month
Maintenance Schedule
Daily/After Each Use
- Wipe down bench and backrest with clean, dry towel
- Leave door ajar to air out
- Empty and rinse any water containers
Weekly
- Wipe all interior surfaces with damp cloth and mild, non-toxic cleaner
- Check door seal for debris
- Inspect heating panels for dust buildup (wipe gently if needed)
Monthly
- Deep clean interior with wood-safe cleaner
- Check exterior for dust accumulation
- Verify control panel buttons and display function
- Test safety features
Quarterly
- Inspect wood for any cracks or damage
- Check all electrical connections (visual inspection)
- Tighten any loose screws or fasteners
- Apply wood conditioner if recommended by manufacturer
Annually
- Professional inspection if recommended
- Consider replacing any worn accessories
- Deep clean heating panels (follow manufacturer instructions)
Accessories to Enhance Your Experience
Essential Accessories
- Seat towel: Cotton towel to sit on; protects bench and absorbs sweat
- Foot towel: Small towel for feet
- Water bottle: BPA-free bottle for hydration during sessions
- Thermometer: Verify internal temperature accuracy
Recommended Additions
- Sauna hat: Prevents overheating of head during extended sessions
- Backrest: Many saunas include these; if not, consider adding for comfort
- Essential oil diffuser: Aromatherapy enhancement (ensure sauna-safe)
- Salt lamp: Creates relaxing ambiance (ensure rated for heat/humidity)
- Reading light: If sauna does not include adequate lighting
Cleaning Supplies
- Non-toxic wood cleaner: Sauna-specific or mild natural cleaner
- Microfiber cloths: For wiping surfaces without scratching
- Spray bottle: For applying cleaning solution
Troubleshooting Common Issues
Sauna Will Not Heat
- Verify outlet has power (test with another device)
- Check circuit breaker (sauna may have tripped it)
- Verify door is fully closed (many have safety switches)
- Check for loose wire connections
- Contact manufacturer if under warranty
Uneven Heating
- Verify all heating panels are functioning
- Check for blocked vents
- Ensure bench is not blocking lower panels
- Rotate seating position during session
- May indicate failing heating element — contact support
Control Panel Malfunction
- Unplug and restart sauna
- Check for moisture in control panel
- Verify connections behind panel
- Replace batteries if battery-powered
Door Not Sealing
- Check for debris in door seal
- Verify door is properly hung and aligned
- Inspect magnetic catch function
- Adjust door hinges if misaligned
Unusual Odors
- New saunas: Run extended burn-in cycle
- Existing saunas: Deep clean all surfaces
- Check for mold/mildew if musty smell
- Ensure adequate ventilation between sessions
Long-Term Care and Preservation
With proper care, a quality infrared sauna should last 10-20 years:
- Keep it dry: Never leave standing water inside; wipe down after each use
- Avoid harsh chemicals: No bleach, ammonia, or strong solvents on wood
- Protect from direct sunlight: If near windows, use curtains to prevent wood fading
- Maintain stable environment: Avoid extreme temperature fluctuations in the room
- Address issues promptly: Small problems become big problems if ignored
- Follow manufacturer guidelines: Warranty may require specific maintenance
Moving or Relocating Your Sauna
Infrared saunas can be disassembled and moved:
- Unplug and allow to cool completely
- Disconnect all electrical connections (photo before disconnecting)
- Remove accessories, bench, and interior features
- Remove door
- Disassemble walls in reverse order of assembly
- Label panels for easier reassembly
- Protect panels during transport
- Reassemble at new location following original instructions
Note: Some wood may have expanded/contracted with heat cycles, making disassembly tighter than original assembly.
Next Steps
Your sauna is set up and ready. Before your first personal session:
- Read our complete safety guide to understand contraindications and best practices
- Review the science behind infrared benefits to set realistic expectations
- Start with shorter sessions (15 minutes) at lower temperatures (120°F)
- Gradually increase duration and temperature over 2-3 weeks
- Track how you feel and adjust your routine accordingly
Remember: the benefits of infrared sauna use come from consistency, not intensity. A 20-minute session three times per week delivers far more value than an occasional 45-minute marathon.
Frequently Asked Questions
What is the difference between infrared and traditional saunas?
Infrared saunas heat your body directly using light waves at 120-150°F, while traditional saunas heat the air to 150-195°F. Infrared saunas warm up faster, cost less to operate, and allow longer sessions at lower temperatures.
Which type of infrared sauna is best?
Far infrared saunas are the most popular and well-researched option for beginners. Full spectrum saunas combine near, mid, and far infrared for comprehensive benefits but cost 30-50% more. For most users, far infrared provides the best value.
How long do infrared sauna sessions last?
Beginners should start with 15-minute sessions at 120°F and build up to 25-45 minutes over several weeks. Most research supporting health benefits used 25-45 minute sessions, 3-4 times per week.
Can I use an infrared sauna every day?
Many healthy adults use an infrared sauna daily without issue, but talk to your doctor first if you have a heart condition, are pregnant, or manage another health condition. Stay hydrated, limit sessions to 45 minutes, and take rest days if you feel fatigued or lightheaded.
What should I look for when buying an infrared sauna?
Key factors include heating technology (carbon fiber panels preferred), EMF levels (look for third-party testing), wood quality (Canadian hemlock or cedar), warranty (minimum 5 years on heaters), and size matching your available space and user count.