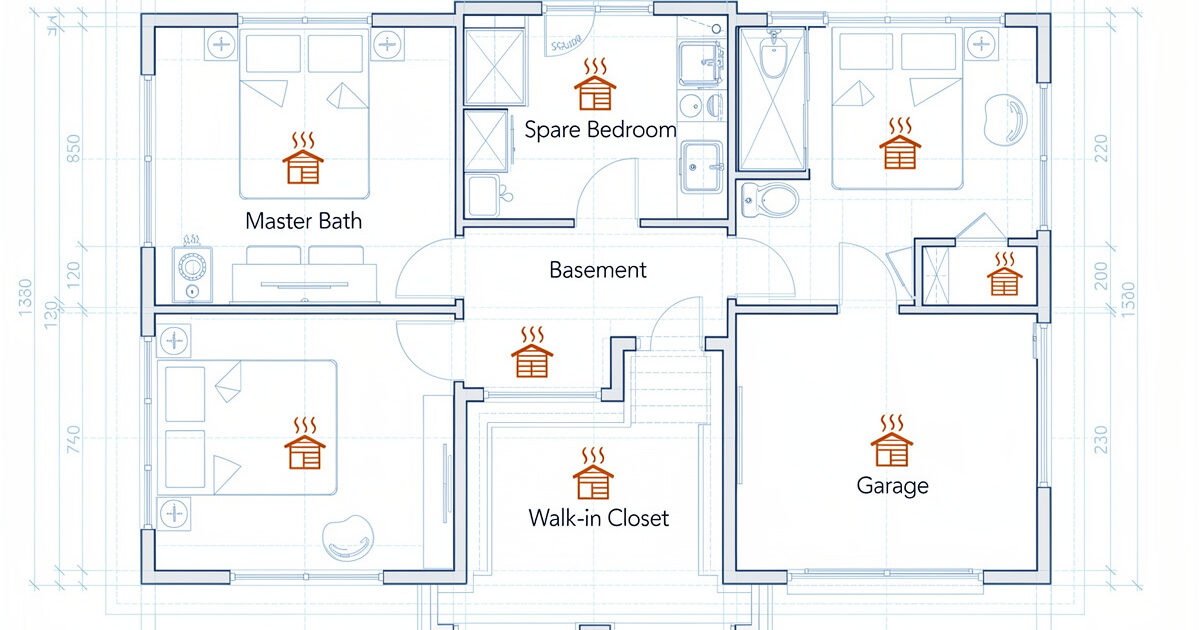
The five best places to put an indoor infrared sauna are: spare bedroom (top choice for 60% of home installs), finished basement, master bathroom, insulated attached garage, and large walk-in closet — in roughly that order by installer feedback. Each room has specific electrical, ventilation, floor-loading, and humidity considerations that determine whether a cabin will work long-term.
This guide covers each of the five rooms in detail, the four placements that look fine but cause problems within 2 years, and the decision matrix for picking your specific install location. For broader home setup guidance, see the home infrared sauna setup guide; for apartment-specific compact options, see the apartment sauna guide. If indoor versus outdoor is still an open question for you, the broader where to install an infrared sauna guide weighs both before you narrow down to a specific room.
The Five Best Indoor Locations
| Room | Suitability | Floor space needed | Electrical | Ventilation | Notes |
|---|---|---|---|---|---|
| Spare bedroom | Best overall | 6×6 ft for 2-person | Existing 110V circuit | HVAC handles it | Most common choice |
| Finished basement | Excellent for sessions | 6×6 ft for 2-person | Often needs new circuit | Add dehumidifier | Fastest cooldown |
| Master bathroom | Good if 80+ sq ft | 6×6 ft for 2-person | Existing or new 110V | Bathroom fan post-session | Slower warmup from ambient humidity |
| Insulated garage | Acceptable if conditioned | Plenty of space | Garage outlet usually OK | Existing garage fans | Must be R-13 walls + conditioned |
| Walk-in closet | Workable for 1-person | 5×5 ft minimum | Often needs added outlet | Crack closet door | Tight quarters; not for daily use |
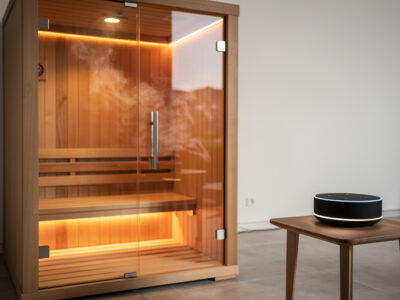
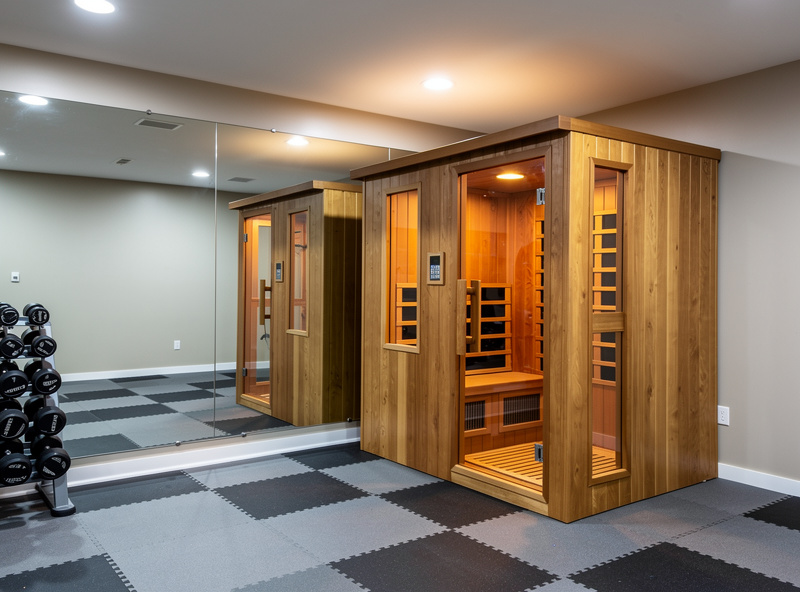
Spare Bedroom: The Most Common Choice
About 60% of home sauna installs end up in a spare bedroom that doubles as a guest room, home office, or wellness room. The reasons stack neatly: existing climate control, dedicated electrical circuits already wired in for bedroom outlets, adequate floor loading for any 1-3 person cabin, and visual separation from main living spaces.
The practical floor plan: a 10×10 spare bedroom (100 sq ft) easily handles a 2-person cabin (16 sq ft footprint plus 6×6 ft clearance zone = 36 sq ft total used) plus a small chair and a side table for water and towels. The remaining 64 sq ft stays usable for a guest bed (which can fold up against a wall during sessions) or a desk.
Floor loading is a non-issue. Standard residential floors handle 40-50 lbs/sq ft live load; a 2-person cabin generates roughly 35 lbs/sq ft including users. Carpet is fine — the cabin sits flat on its own base, and the manufacturer’s vinyl floor mat protects against any compression marks. Hardwood and laminate are also fine, with the same mat.
The one watch-out: bedrooms in older homes (pre-1985) sometimes share a single 15-amp circuit across the whole room. Use the breaker test from the home sauna hub guide to verify dedicated circuit availability before plugging in the cabin. About 30% of older bedrooms need an electrician to add a separate circuit ($150-$400).
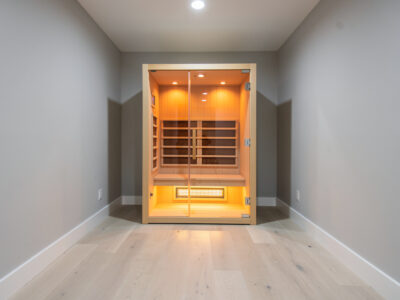
Finished Basement: Best Session Quality
Finished basements deliver the best session quality of any indoor location because the cool ambient temperature (typically 60-65°F year-round) accelerates post-session cooldown by 8-15 minutes compared to a warmer upstairs room. This matters for users running daily sessions — the faster cooldown means more time for the next activity instead of sitting in a partially-cooled cabin.
Three basement-specific considerations:
- Concrete floors need a thermal break. Cabins sitting directly on concrete feel cold underfoot when entering or exiting and the basement chill works against the heater during long sessions. A $60-$140 rubber gym mat or vinyl sauna mat under the cabin solves this and adds a moisture barrier.
- Humidity needs management. Basements run higher relative humidity than upstairs rooms (55-70% vs 30-50% upstairs), which slows cabin warmup by 4-8 minutes and accumulates over months as moisture in the surrounding space. A basic 30-pint dehumidifier ($150-$300) maintains the surrounding space at 45-55% RH year-round.
- Electrical may need an electrician. Basement outlets are often on shared kitchen/laundry circuits or wired only with one or two GFCI outlets per finished area. Verify dedicated circuit availability before ordering. About 50% of basement installs need a new dedicated 20-amp circuit added ($200-$500).
Avoid placing the cabin against an exterior basement wall — concrete foundations transfer cold and the temperature differential against the cabin shell encourages condensation behind the cabin. Center placement or interior-wall placement performs much better.
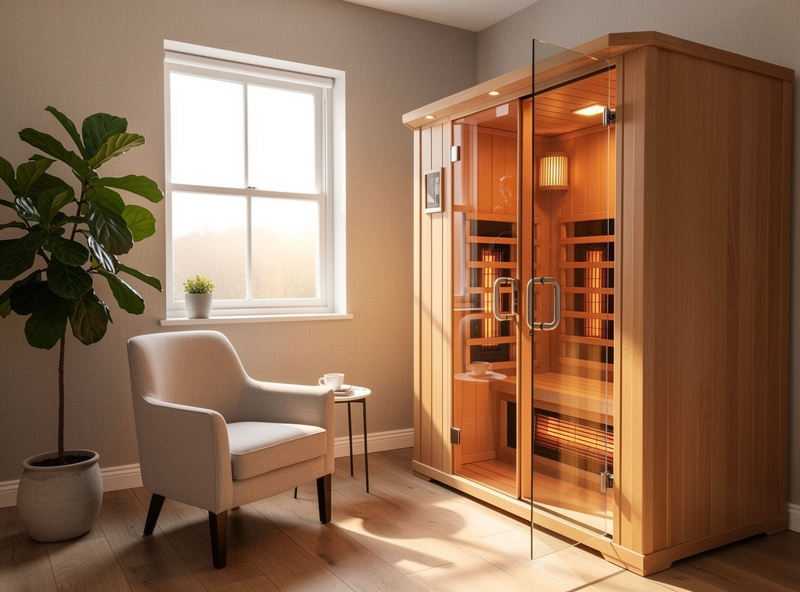
Master Bathroom: Convenient if Spacious
Master bathrooms work well for sauna installs when the bathroom is at least 80 sq ft and has a 32-inch interior door for cabin panel delivery. The convenience factor is strong: showering immediately before and after sessions is built in, the floor is already moisture-tolerant, and ventilation infrastructure (the bathroom fan) is already in place.
The compromises specific to bathrooms:
- Ambient humidity rises during shower use. Post-shower humidity in a bathroom typically peaks at 65-75% for 30-45 minutes. Starting a sauna session during this window adds 4-8 minutes to warmup time. Run the bathroom fan for 20 minutes before starting the cabin.
- The bathroom is occupied during sessions. A 30-minute sauna session ties up the bathroom for any other use. Master suites with two-vanity bathrooms or attached half-baths handle this; shared family bathrooms create scheduling conflicts.
- Some cabins won’t fit through standard bathroom doors. Verify cabin panel dimensions before ordering. The largest panels usually run 32-34 inches wide; older homes with 28-30 inch bathroom doors will need cabin disassembly to a smaller component level for delivery.
The post-session protocol in bathrooms is to run the bathroom fan for 30 minutes after each session, which maintains ambient humidity at normal levels and prevents the slow moisture accumulation that affects mirror seals and wallpaper over months. Pair sessions with the safety guidance in our infrared sauna safety guide on hydration and immediate post-session cooldown.
Insulated Attached Garage: Acceptable with Caveats
Insulated attached garages work as sauna locations only if the garage is conditioned to within 50-80°F year-round. Uninsulated garages cause two failure modes: 30+ minute warmup times in winter (the heater fights the cold ambient instead of just heating the cabin air), and condensation forming inside the cabin shell during temperature swings, which accelerates wood damage.
The minimum garage spec for sauna placement:
- R-13 walls and R-30 ceiling insulation. Below this, winter warmup times become unworkable.
- Climate control year-round. A mini-split HVAC unit ($1,500-$3,500 installed) maintains 65-75°F continuously and handles humidity. Space heaters alone aren’t enough — the cycling causes moisture issues.
- Sealed garage door. Gaps around the door let in cold drafts that fight the cabin’s heater output.
- Dedicated 110V or 240V circuit. Garages typically have GFCI receptacles on shared circuits. Add a dedicated circuit during initial wiring or have an electrician install one ($200-$500).
The advantage of garage placement is the floor loading concern disappears entirely (concrete handles 100+ lbs/sq ft) and the visual separation from living space is complete. Many garage installs also pair with a basement workout area for a full home gym + sauna setup. For a deeper foundation/electrical perspective relevant to garage placement, the foundation, power and permits guide covers similar concrete-floor and dedicated-circuit considerations.
Walk-In Closet: Workable for Single Users
Walk-in closets work as sauna locations only for the smallest 1-person cabins (3×3 ft footprint) in closets at least 5×5 ft. Tight quarters mean ventilation is critical — keep the closet door cracked during sessions or install a 4-inch through-wall vent to the adjacent room. The session experience is acceptable but not great because dwelling-time air stagnation accumulates faster in small enclosures.
Closet installs work best as secondary sauna locations rather than primary daily-use setups. A spare-bedroom or basement install handles 90% of sessions, with the closet cabin available for quick 15-minute mid-day sessions when the main cabin is unavailable. Single-cabin households should pick a different room. If a closet is genuinely your only option, the convert a closet to infrared sauna guide covers what actually fits and the ventilation workaround in more depth.
Four Placements to Avoid
The four indoor placements that look fine but cause problems within 2 years:
- Unfinished basements with chronic moisture issues. The cabin will dry out fine internally, but the surrounding space accumulates moisture against the cabin shell, accelerating wood damage. Finished basements with under 55% RH are fine; unfinished basements with mineral staining or visible moisture aren’t.
- Crawl spaces. No HVAC connection, no consistent temperature, no easy access for installation or maintenance. Don’t install here regardless of available space.
- Sunrooms or three-season rooms. Without year-round climate control these spaces drop below 50°F in winter and exceed 90°F in summer, both of which fall outside cabin operating range. Convert to four-season space first or pick a different room.
- Bathrooms under 60 sq ft. The cabin physically fits but the post-shower humidity has nowhere to dissipate, and you’ll see chronic ambient humidity above 70% within 6 months. Master bathrooms under 80 sq ft are workable only with aggressive post-session ventilation.
The Placement Decision Matrix
Use this 4-question decision tree to pick your install location:
- Do you have a spare bedroom or home office of 100+ sq ft? If yes, install there. Done.
- If no, is your basement finished and dehumidifier-managed? If yes, basement is your best option. Add the rubber floor mat.
- If no on both, is your master bathroom 80+ sq ft with a 32-inch door? If yes, master bath works. Run the fan post-session.
- If no on all three, is your attached garage insulated and climate-controlled to 50-80°F year-round? If yes, garage works. If no, install climate control first or pick the apartment formats covered in our apartment sauna guide.
For broader buying considerations including which cabin to pick for each room type, see our best home infrared saunas roundup and the broader how to choose framework. Once your room is confirmed, the infrared sauna installation requirements guide covers structural load limits, ventilation clearances, and permit thresholds by location type — the pre-delivery site prep checklist. For detailed floor material ratings and per-wall clearance specs, see the sauna flooring and clearance guide.
Frequently Asked Questions
What is the best room to put an infrared sauna in?
A spare bedroom or home office is the best location for about 60% of home installs. It offers existing climate control, dedicated electrical circuits, adequate floor loading, and visual separation from living spaces. Finished basements come second, master bathrooms third, insulated garages fourth.
Can I put an infrared sauna in my basement?
Yes — finished basements deliver the best session quality of any indoor location because cool ambient temperature speeds post-session cooldown by 8-15 minutes. Add a rubber floor mat for thermal insulation, run a 30-pint dehumidifier to keep humidity under 55%, and verify dedicated circuit availability.
Can I put an infrared sauna in my bathroom?
Master bathrooms work if the bathroom is at least 80 sq ft and the door is 32 inches wide. Run the bathroom fan for 20 minutes before sessions to clear post-shower humidity, and again for 30 minutes after each session. Smaller bathrooms accumulate too much chronic humidity and aren’t recommended.
Will an infrared sauna damage my carpet?
No. The cabin sits flat on its own base, and the manufacturer-supplied vinyl floor mat protects against compression marks. Carpet is one of the most common installation surfaces — heat transfer is downward and minimal because the cabin floor is insulated. Move the cabin every 2-3 years to prevent permanent compression.
Can I put a home sauna in my garage?
Only if the garage is insulated to R-13 walls and R-30 ceiling and climate-controlled to 50-80°F year-round. Uninsulated garages cause 30+ minute warmup times in winter and accelerate cabin wood damage from condensation. A mini-split HVAC unit ($1,500-$3,500) handles year-round conditioning.
How much clearance does an indoor sauna need around it?
Most cabins require 4-6 inches of clearance on all sides for ventilation and heater wiring access, plus 36 inches of door-swing clearance in front. Pushing the cabin against a wall traps heat against drywall, which can cause discoloration over 18 months. Always follow the manufacturer’s clearance specs.
Can I install an infrared sauna in a walk-in closet?
Workable for the smallest 1-person cabins (3×3 ft footprint) in closets at least 5×5 ft, but only as a secondary sauna location. Tight quarters cause ventilation problems and dwelling-time air stagnation in small enclosures. A spare bedroom or basement is a better primary location.
Related Articles
- Home Infrared Sauna Setup Guide — the parent hub
- Best Home Infrared Saunas 2026 — top 7 cabins ranked for indoor use
- Indoor Sauna for Apartments and Small Homes — sub-30 sq ft setups
- How to Set Up an Infrared Sauna at Home — installation walkthrough
- Infrared Sauna Safety Guide — session safety and contraindications