An infrared sauna needs a level, moisture-tolerant floor such as tile, sealed concrete, or vinyl plank, plus a clearance gap of a few inches on every side for airflow and heat dissipation. Carpet and unsealed wood are the floors to avoid, and wedging the cabin tight against drywall is the clearance mistake that ages the cabinet unevenly. Get the floor and the gaps right before assembly and the rest of the install falls into place.
These two details, flooring and clearance, are the ones buyers skip most and regret most, because neither shows up in the glossy product photos. I run my own cabin on vinyl plank over a level subfloor with the manufacturer’s clearance held on all four sides, and the difference between doing that and not is the difference between a cabinet that stays flat and tight for years and one that develops door-seal gaps and panel cupping. Here is exactly what the floor needs to do, which materials deliver it, and how much clearance is actually enough.
As an Amazon Associate I earn from qualifying purchases. Some links below are affiliate links, at no extra cost to you.
Why the Floor Matters More Than It Looks
The floor under a sauna has three jobs: stay level so the frame does not rack, shed the slight moisture a session produces, and let air move under and around the cabin base. A sweaty, unventilated floor traps humidity against the wood; an unlevel one twists the frame and opens gaps in the door seal that leak your preheat. Neither is dramatic on day one, but both compound over a winter of use.
This is why I treat the floor as a real install decision rather than whatever happens to be in the room. A level, hard, moisture-tolerant surface is the foundation the cabin sits on, literally, and it is far cheaper to sort before assembly than after. The hub’s installation requirements guide lists the floor among the four non-negotiables, alongside the dedicated circuit covered in the breaker requirements guide.
Best and Worst Flooring Materials
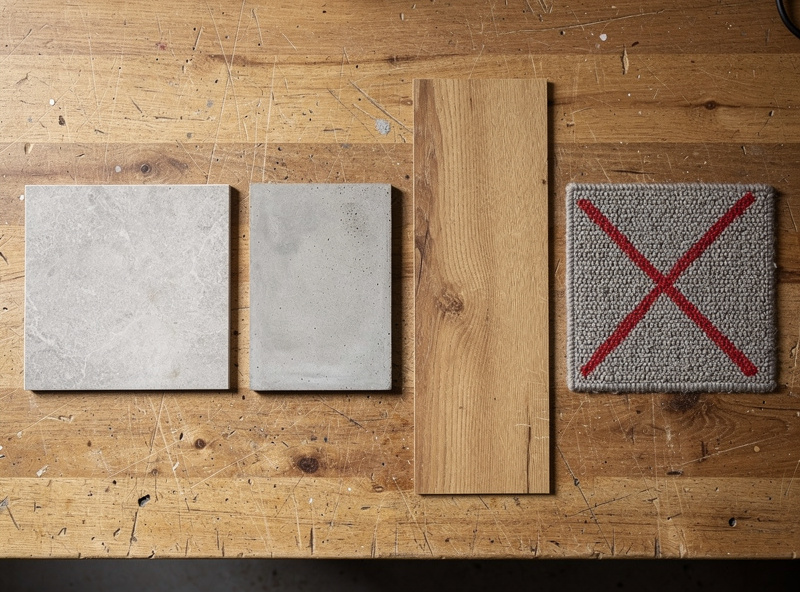
Tile, sealed concrete, and luxury vinyl plank are the three best floors for an infrared sauna because they are level, water-tolerant, and easy to wipe down. Carpet is the worst, trapping moisture and blocking airflow, and unsealed wood or laminate that can swell is a close second to avoid. Here is how the common surfaces compare on the factors that matter.
| Flooring | Moisture-tolerant | Level/hard | Verdict |
|---|---|---|---|
| Ceramic/porcelain tile | Excellent | Yes | Ideal |
| Sealed concrete | Excellent | Yes | Ideal |
| Luxury vinyl plank | Good | Yes | Great, what I use |
| Sealed/engineered hardwood | Fair | Yes | OK with a mat |
| Laminate | Poor (swells) | Yes | Use a barrier |
| Carpet | Poor (traps moisture) | No | Avoid |
If your room is carpeted and you cannot change it, the workaround is a hard, moisture-tolerant pad or mat under the full footprint of the cabin to give the base a level, breathable surface. A waterproof floor protection mat is the cheapest fix and also protects sensitive flooring like hardwood from any incidental moisture.
Getting the Floor Level
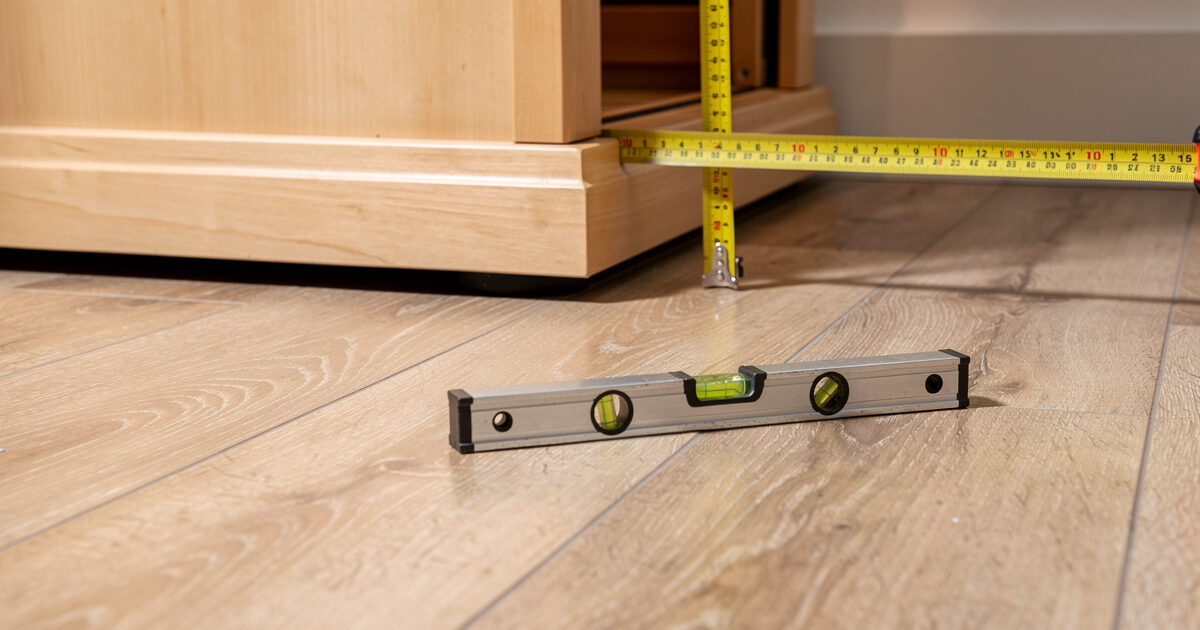
The cabin frame must sit on a level surface, because even a small slope racks the structure and opens gaps in the door seal that leak heat and lengthen preheat. Before assembly I set a spirit level across the footprint in two directions; if it is off, I shim the low corners until it reads true. This five-minute check prevents the single most common assembly complaint, a door that will not seal evenly.
Most finished floors are close enough to level that minor shimming handles it, but older basements and garages can have a real slope toward a drain. In those rooms a self-leveling compound or a leveled platform under the cabin is worth the effort, because no amount of careful assembly fixes a frame built on a tilt. A simple spirit level is the only tool you need to check it, and it is the first thing I reach for on any install.
How Much Clearance to Leave
Leave the manufacturer’s stated clearance, typically a few inches on every side and more behind the heater wall, so radiant heat can dissipate and air can circulate around the cabin. The exterior of an infrared cabin stays cool to the touch, but the air around it carries heat away, and choking that gap produces a hot wall behind the unit and uneven aging of the cabinet.
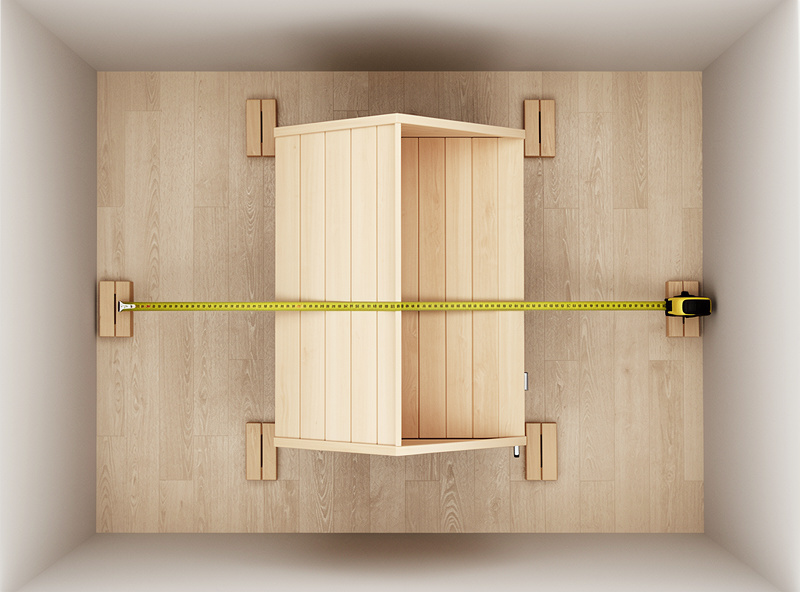
I mark the cabin’s footprint plus its clearance on the floor with painter’s tape before the boxes even arrive, which instantly shows whether the chosen spot actually fits. People consistently underestimate this and end up with the unit an inch from the wall, which is exactly the configuration that traps heat. If your manufacturer does not state a clearance, a few inches on the sides and a bit more behind the heater panels is a safe default. The room siting guide walks through choosing a space with enough room for that footprint in the first place.
Clearance in Front of the Glass Door
The front clearance matters as much as the sides, because the glass door radiates heat outward and needs room to swing fully open. I leave a clear arc in front of the cabin with nothing heat-sensitive parked there, both so the door opens without hitting furniture and so the radiant heat off the glass is not pointed at something it should not be. A bench or towel hook a comfortable step back from the door is fine; a plastic shelf or upholstered chair right against the glass is not.
This is the clearance people forget because they are focused on the back and sides where the heater panels live. But the door is where you enter and exit, often slightly disoriented from the heat, so a clear, uncluttered approach is a safety detail as much as a heat one. Plan the front arc when you tape out the footprint, not after the cabin is built and you discover the door clips the wall.
Airflow Under the Cabin
Most cabins sit on small feet or a raised base specifically so air can pass underneath, and blocking that gap defeats the design. On a perfectly flat floor the factory feet usually provide enough clearance, but if the floor is slightly uneven or you have added a mat, make sure the base is not sealed flat against the surface. The under-cabin gap is part of how the unit sheds the moisture and heat that would otherwise collect at floor level.
If your cabin did not ship with adequate feet, or you want extra airflow on a concrete slab that can wick cold, a set of low furniture risers or feet lifts the base a touch and keeps air moving. Keep any lift modest and stable, since you do not want to compromise the cabin’s footing, but a small, even gap underneath is exactly what the base wants.
Handling the Small Amount of Moisture
Infrared saunas run cooler and drier than steam rooms, but a session still produces sweat, and that moisture needs somewhere to go rather than sitting on the floor or in the wood. A moisture-tolerant floor sheds it, ventilation carries it off, and a quick wipe-down after each session handles the rest. This is a small routine, not a big chore, but skipping it is how mustiness and wood problems start.
On a hardwood or laminate floor I always use a barrier mat under the cabin, because even infrequent moisture finding a seam will eventually swell the board, and the same moisture is one reason the GFCI-protected circuit in the outlet wiring guide is non-negotiable. On tile, sealed concrete, or vinyl I simply wipe the floor down with the cabin interior after a session. Pairing the right floor with the post-session dry-out, which the broader ventilation routine supports, keeps both the floor and the cabin in good shape for years.
Frequently Asked Questions
What kind of floor do you need for an infrared sauna?
A level, moisture-tolerant floor such as tile, sealed concrete, or luxury vinyl plank. These shed the slight moisture from sweat and stay flat under the cabin frame. Carpet and laminate that can swell are the surfaces to avoid.
Can I put an infrared sauna on carpet?
Not directly, because carpet traps moisture and blocks the airflow the cabin base needs. If you cannot change the floor, place a hard, waterproof protection mat under the full footprint of the cabin to give it a level, breathable surface.
How much clearance does an infrared sauna need?
Leave the manufacturer’s stated clearance, typically a few inches on every side and a bit more behind the heater wall, so heat dissipates and air circulates. Wedging the cabin tight against drywall traps heat and ages the cabinet unevenly.
Does the floor under a sauna need to be level?
Yes. An unlevel floor racks the cabin frame and opens gaps in the door seal that leak heat and lengthen preheat. Check the footprint with a spirit level in two directions before assembly and shim any low corners until it reads true.
Can an infrared sauna sit on hardwood floors?
Sealed or engineered hardwood works if you place a moisture barrier mat under the cabin, since even occasional sweat reaching a seam can swell the boards over time. Tile, sealed concrete, and vinyl plank are lower-risk choices.