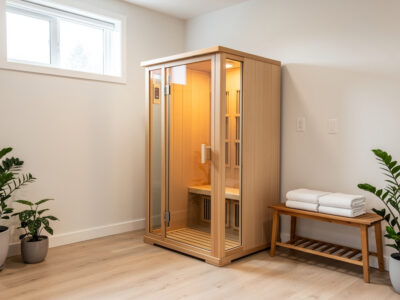
Most one- and two-person infrared saunas run on a dedicated 120V/20A circuit, while larger three- and four-person and many full-spectrum cabins need a 240V circuit, usually 20A or 30A. The single number that decides which camp you are in is the nameplate amperage on the unit, not the voltage of the outlet you happen to have. Get that reading right and the breaker question answers itself.
This is the question I get asked more than any other about installs, and it is also where the most expensive mistakes happen, because people order a cabin, clear a spot, and only discover on delivery day that the spec plate calls for 240V they do not have. I have wired the dedicated circuit that feeds the cabin I run and metered its real draw across a full Swedish winter, so let me walk through exactly how to read your unit’s requirement and what breaker it actually needs. Where the work crosses into running new wire, I will tell you plainly to bring in a licensed electrician, because a continuous, damp-environment load is not a place to guess.
As an Amazon Associate I earn from qualifying purchases. Some links below are affiliate links, at no extra cost to you.
120V or 240V: How to Know Which You Need
Read the nameplate wattage and divide by the voltage to get amperage; if the unit is rated above roughly 1,800 watts, it almost always ships as a 240V cabin. A 1,600-watt unit on 120V draws about 13.3 amps and belongs on a 20A circuit; a 3,000-watt full-spectrum cabin on 240V draws about 12.5 amps and belongs on a 240V/20A or 30A line. Same comfortable current, very different wiring.
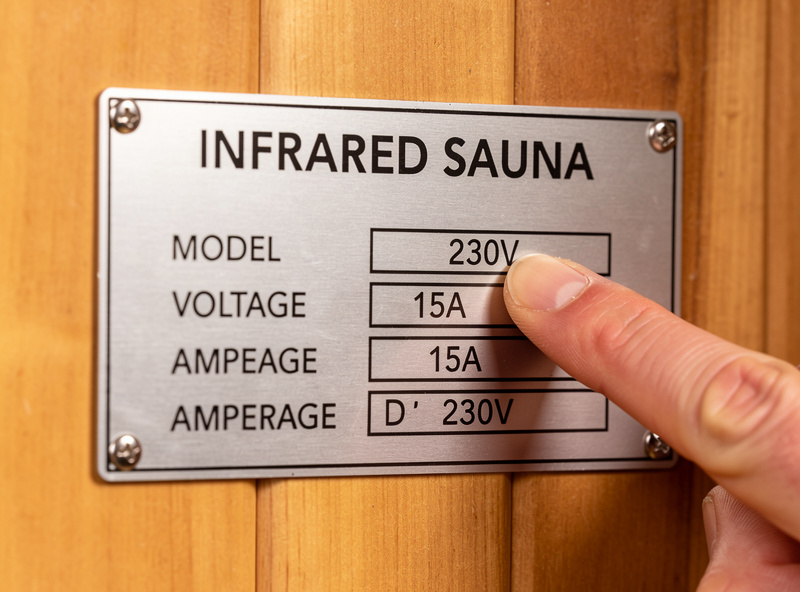
The reason manufacturers move big cabins to 240V is simple physics: doubling the voltage halves the current for the same power. Lower current means thinner conductors run cooler and the breaker sits well within its rating during a long session. So when you see a four-person cabin asking for 240V, it is not the maker being difficult; it is the only sane way to feed that much continuous heat without oversized wire. A quick non-contact voltage tester is the cheapest way to confirm what an existing outlet actually carries before you assume.
Why the Circuit Must Be Dedicated
An infrared sauna is a continuous load, drawing near its rated current for the entire 30-to-60-minute session plus preheat, which is exactly the load profile that nuisance-trips a shared breaker. Standard practice sizes a circuit so a continuous load stays under 80 percent of the breaker rating, which is why a 13.3-amp cabin wants a 20A breaker rather than a 15A one, even though 15A “technically” covers it on paper.
Sharing the line is the most common install error I see. Put the sauna on the same breaker as a bathroom outlet or a laundry circuit and the first time both draw at once, the breaker trips, and over time the steady heat stresses marginal wiring. A dedicated line removes both problems. The hub’s installation requirements guide frames why this is the real install and the cabin is the easy part, and a plug-in energy meter lets you watch the real, sustained draw on a 120V unit so you can see for yourself how close to the breaker ceiling it runs.
Breaker and Wire Sizing by Cabin Size
Here is how the common cabin classes map to the breaker, voltage, and plug they typically require. Always defer to your specific unit’s nameplate and your local code, but this table tells you what to expect before you order.
| Cabin | Power | Voltage | Breaker | Plug / connection |
|---|---|---|---|---|
| 1-person | 1,200–1,500 W | 120V | 15–20A | 5-15 or 5-20 |
| 2-person | 1,500–1,800 W | 120V | 20A | 5-20 |
| 2-person full-spectrum | 1,800–2,400 W | 120V or 240V | 20A | 5-20 or 6-20 |
| 3-person | 2,400–3,000 W | 240V | 20–30A | 6-20 / 6-30 |
| 4-person | 3,000–3,600 W | 240V | 30A | Hardwired or 6-30 |
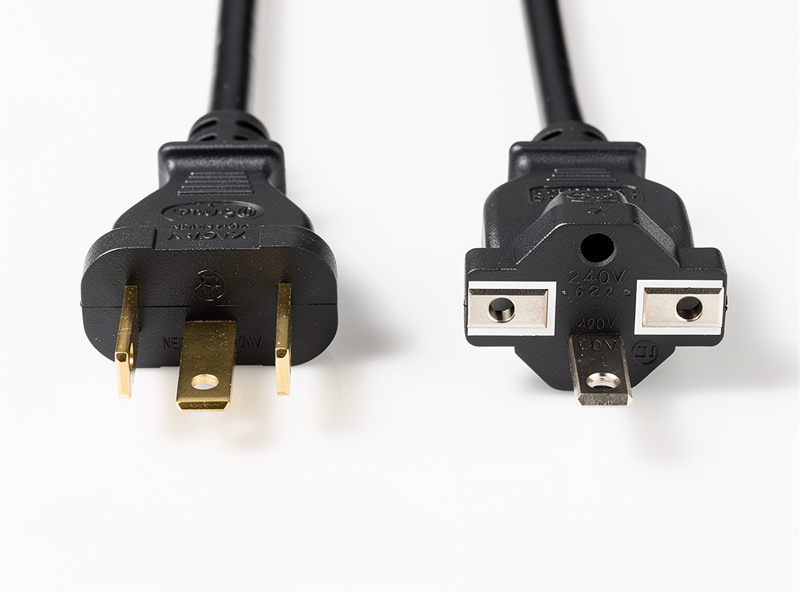
The wire gauge follows the breaker, not the other way around. A 20A circuit is typically 12-gauge copper; a 30A circuit steps up to 10-gauge. Undersizing the conductor for the breaker is a fire risk, which is the core reason this step belongs to a qualified electrician once new wire is involved. A clamp meter is the tool I reach for to confirm actual current on a live circuit without breaking anything open.
GFCI and 240V Circuits
GFCI protection is required for circuits in damp environments, and a sauna qualifies because sweat, bare feet, and electricity share the same small space. On a 120V cabin a GFCI receptacle or breaker handles it; on a 240V circuit you use a two-pole GFCI breaker. This is not optional safety theater. A ground fault in a wet environment is precisely the scenario GFCI exists to interrupt before it reaches a person.
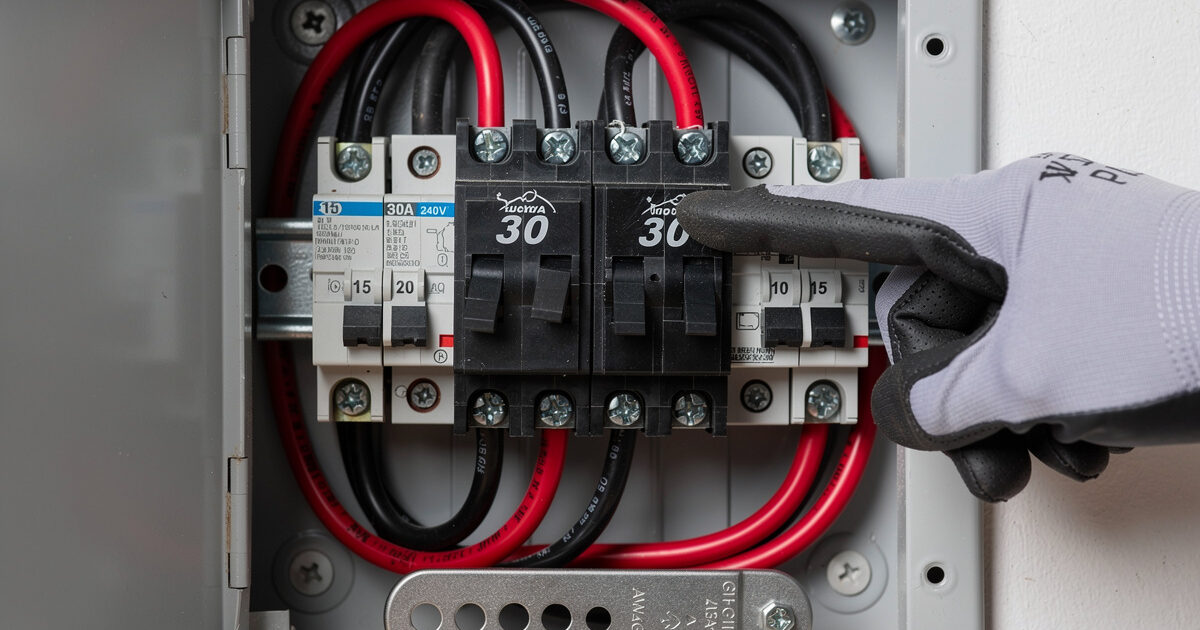
I will not pretend the 240V GFCI breaker is a casual swap. Sizing and installing a two-pole GFCI breaker, landing the neutral correctly, and verifying the trip function is electrician territory. What you can do as the owner is confirm your panel has room for it and that the cabin’s connection type (cord-and-plug versus hardwired) matches what you are planning. The broader electrical-safety logic, including grounding the cabin chassis, sits in the main install guide.
Does Your Panel Have Room?
A 240V circuit needs two adjacent slots in your service panel and enough spare capacity in the panel’s total rating to add the load. Before you order a big cabin, open the panel cover and check for two free slots; if the panel is full, you are looking at a tandem-breaker workaround or a subpanel, both of which add cost and bring an electrician into the project regardless.
This is the planning step that prevents the delivery-day surprise. A 120V cabin usually just needs one free slot for a dedicated 20A breaker, which most panels can spare. A 240V cabin is a bigger ask, and a fully loaded panel can turn a “simple” sauna install into a meaningful electrical job. Knowing this before you buy lets you either choose a 120V cabin that your panel can feed or budget for the electrical work up front. The off-grid power guide covers the same load from the solar-and-battery angle if you are feeding the cabin off the grid.
Cord-and-Plug or Hardwired?
Smaller cabins almost always come cord-and-plug, meaning you just need a correctly rated dedicated outlet, while larger 240V units are frequently hardwired directly to the circuit. The connection type the manufacturer chose dictates what your electrician installs at the wall, so it is worth confirming before any wiring is run. A cord-and-plug 120V cabin is the friendliest case: a dedicated 20A GFCI receptacle and you are done, which is exactly the setup the outlet wiring guide walks through in detail.
Hardwired connections show up on the bigger cabins because a 30A continuous load is cleaner to terminate permanently than to push through a plug that gets warm. If your unit is hardwired, there is no outlet to see; the feed lands in a junction box and connects to the cabin’s wiring. Neither approach is better in the abstract, but they ask for different work at the wall, and ordering a hardwired cabin expecting to “just plug it in” is a classic mismatch. Check the spec sheet’s connection section the same time you check the amperage.
What the Draw Actually Looks Like
On my kill-a-watt meter, the cabin I run settles into a predictable rhythm: a high, steady pull during preheat as every panel ramps, then a lower cycling draw once the set temperature is reached and the controller modulates to hold it. That preheat pull is the moment that matters for breaker sizing, because it is the closest the unit gets to its full nameplate amperage for a sustained stretch. A circuit that only “just” covers the steady-state number can still trip during a cold-start preheat.
This is why I tell people to size for the nameplate and the preheat, not for the gentler cycling number they might see mid-session. Across the heaters I have lived with, the full-spectrum unit with its near-infrared emitter ramps hardest and longest, which is exactly the cabin most likely to be on 240V in the first place. Watching your own unit on a plug-in meter, if it is a 120V model, turns an abstract spec into a number you can see, and it is the single most reassuring thing you can do after an install to confirm the circuit is comfortable.
Frequently Asked Questions
Does an infrared sauna need 240V?
Only larger cabins do. One- and two-person units typically run on a 120V/20A dedicated circuit, while three- and four-person and many full-spectrum cabins need 240V at 20A or 30A. The nameplate wattage decides which you need.
What size breaker does an infrared sauna need?
Most two-person 120V cabins need a dedicated 20A breaker, sized so the continuous load stays under 80 percent of the rating. Larger 240V cabins typically use a 20A or 30A two-pole breaker. Match the breaker to the nameplate amperage.
Can I run an infrared sauna on a normal household circuit?
Only if that circuit is dedicated and correctly sized to the cabin’s amperage. Sharing a circuit with other outlets causes nuisance trips under the sauna’s continuous load and can overheat marginal wiring over time.
What wire gauge does a sauna circuit use?
The wire follows the breaker. A 20A circuit typically uses 12-gauge copper and a 30A circuit uses 10-gauge. Undersizing the conductor for the breaker is a fire risk, so new wiring should be run by a qualified electrician.
Do 240V sauna circuits need GFCI protection?
Yes. Any sauna circuit in a damp, sweat-prone space should be GFCI-protected. A 120V cabin uses a GFCI receptacle or breaker, while a 240V circuit uses a two-pole GFCI breaker installed by an electrician.