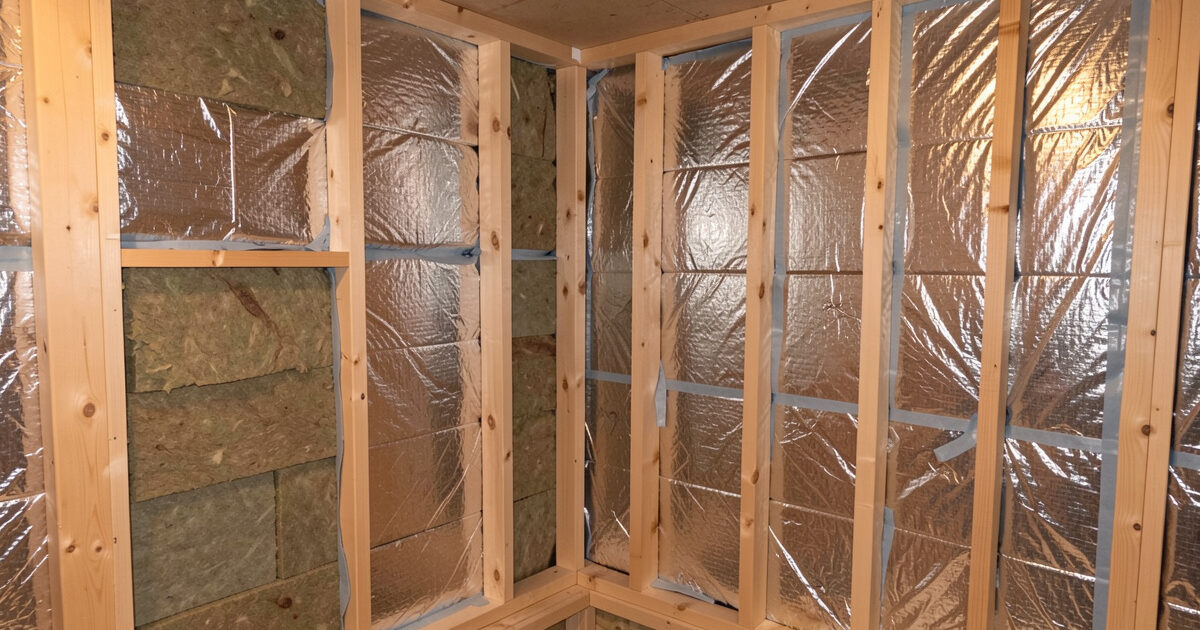
Insulating a DIY infrared sauna means filling the stud bays with a heat-stable batt (mineral wool is ideal), then facing the interior with a reflective foil vapor barrier and taping every seam. Aim for roughly R-13 in the walls and R-19 or better in the ceiling. Insulation is the cheapest performance upgrade in the build — it cuts preheat time and the kWh every session draws.
People treat insulation as the boring stage and underbuild it, then wonder why the cabin reads high on the kill-a-watt and never feels quite warm. In the cabin I run, the foil-faced bays are the reason a 45-minute session lands near 1.0 to 1.3 kWh instead of well above it. This is how I insulate and vapor-control a build, the materials that belong in the heat, and the seam detail that decides whether the wood stays dry. It is a core stage of the DIY infrared sauna guide, between framing and lining the wood.
Why Insulation Matters More in an Infrared Cabin
An infrared sauna heats your body directly with radiant panels rather than heating a large volume of air, so it holds less stored heat and loses energy fast through cold, uninsulated walls. Good insulation keeps the surfaces warm, so the panels are not fighting a heat sink and the cabin reaches felt heat sooner.
The payoff shows up in two numbers I track: preheat time and kWh per session. A poorly insulated cabin against a cold exterior or basement wall can double its preheat and noticeably raise its running cost — the line most buyers never run, detailed in electricity cost. Insulation also keeps the heat inside the cabin instead of warming the room around it, which matters if the sauna shares space with living areas. It is a one-time material cost that pays back every single session for the life of the build.
Choose a Heat-Stable Insulation
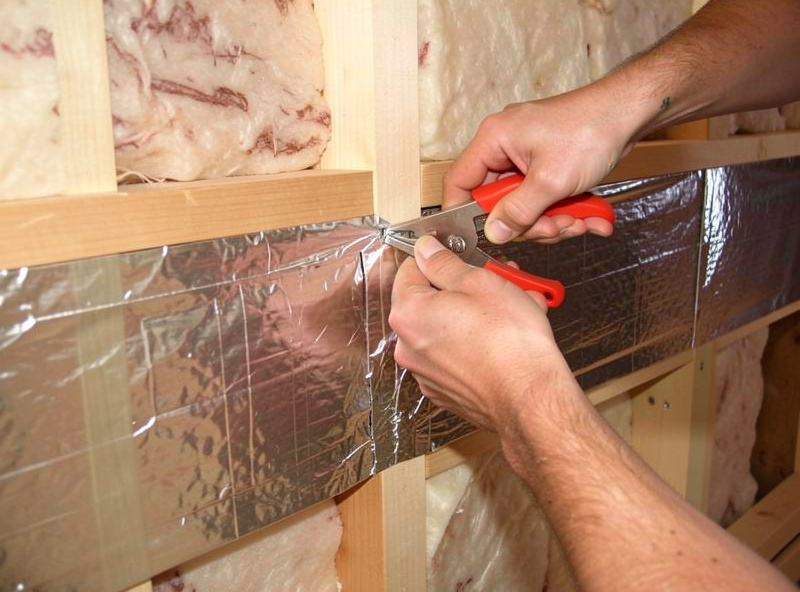
Use mineral wool (rock or slag wool) in the stud bays where you can — it is non-combustible, holds its shape, and is unbothered by the warm side of a sauna wall. Fiberglass batt works and costs less; the key is that whatever you choose sits behind a proper vapor barrier and never touches the hot panels directly.
I favor mineral wool for its fire behavior and because it does not slump over years of heat cycling. Avoid any foam board with a low heat tolerance directly against the warm interior, and never let loose insulation contact the back of a heater panel. The batt lives in the framed bay; the foil and wood go in front of it. Match the batt thickness to your stud depth so the bay is full but not crushed — compressed insulation loses R-value.
| Location | Target R-value | Typical material | Notes |
|---|---|---|---|
| Walls (2×4 bay) | R-13 to R-15 | Mineral wool / fiberglass batt | Fill bay fully, do not compress |
| Ceiling | R-19 or better | Mineral wool batt | Heat rises — insulate most here |
| Floor (if cold below) | R-10+ | Rigid board under subfloor | Only if over crawlspace/garage |
| Vapor barrier | — | Reflective foil, taped | Interior warm side, seams sealed |
The Foil Vapor Barrier Does Two Jobs
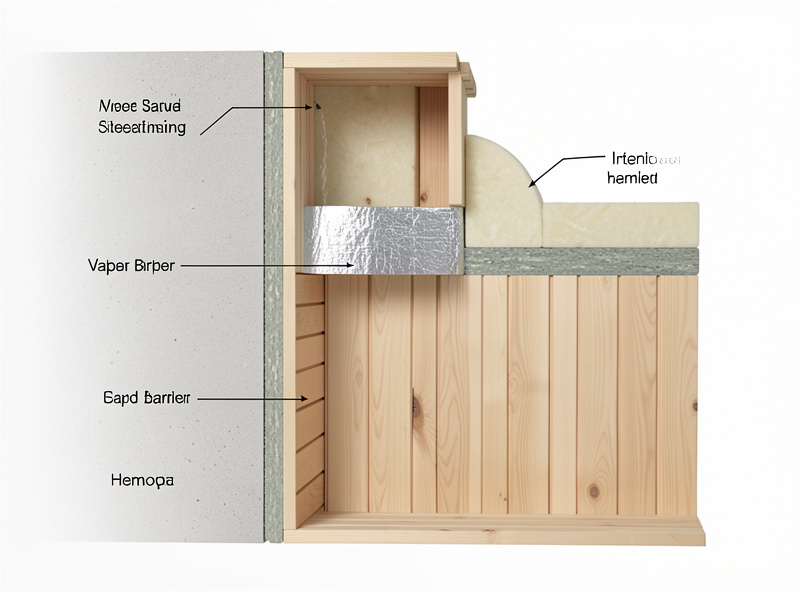
Face the insulation on the interior, warm side with a reflective foil vapor barrier. It does two jobs at once: it stops session moisture from driving into the cold framing, and its reflective surface bounces radiant heat back into the cabin, shortening preheat. This dual role is why foil, not plain poly, is the sauna standard.
Orient the foil shiny-side inward toward the panels so it reflects. The vapor barrier must go on the warm side — the interior — because that is where the humidity is during a session; put it on the cold side and you trap moisture in the wall. Leave a small air gap between the foil and the wood lining where the wall design allows it, because a reflective surface works best facing an air space rather than pressed tight against the boards. The cross-section logic ties directly into ventilation, which handles the moisture the barrier keeps out of the walls.
Tape Every Seam — This Is Where Builds Fail
Seal every foil seam, every staple line, and every penetration with foil tape so the vapor barrier is genuinely continuous. An unsealed seam is a moisture path into the framing and a heat leak, and it is the single most common insulation mistake I see in DIY builds.
I tape seams with proper aluminum foil tape, overlap sheets by a few inches, and seal around the cable penetration where the heater wiring passes through. The goal is a sealed reflective envelope broken only by the intentional vents. Wherever wiring or the controller passes the barrier, tape the foil tight to the cable so you have not opened a gap. Get this continuous and the cabin holds heat, stays dry in the walls, and meters low; leave gaps and you will chase cold spots and, eventually, mold in the framing. Once the envelope is sealed, the wood goes on — bare, as covered in best wood for a DIY sauna.
Frequently Asked Questions
What R-value do I need for a DIY infrared sauna?
Aim for about R-13 to R-15 in 2×4 walls and R-19 or better in the ceiling, since heat rises and the ceiling loses the most. A floor over a cold crawlspace or garage benefits from R-10-plus rigid board. Fill bays fully without compressing the batt.
What insulation is best for an infrared sauna?
Mineral wool is ideal — non-combustible, shape-stable, and unbothered by the warm wall. Fiberglass batt works for less money. Whatever you use, it must sit behind a foil vapor barrier and never touch the back of a heater panel directly.
Why use foil instead of plastic vapor barrier in a sauna?
Foil does two jobs: it blocks moisture like any vapor barrier, and its reflective surface bounces radiant heat back into the cabin, shortening preheat. Plain poly only blocks moisture. Orient the foil shiny-side inward and place it on the warm interior side.
Which side does the vapor barrier go on?
The interior, warm side — the same side as the heat and humidity during a session. Putting it on the cold exterior side traps moisture inside the wall and rots the framing. Tape every seam so the barrier is one continuous reflective envelope.
Do I need an air gap behind the sauna wood?
Where the wall design allows it, a small air gap between the foil and the wood lining helps the reflective surface work and gives moisture a path to dry. It is a refinement, not a requirement — a fully sealed foil barrier is the part that matters most.
Can poor insulation cause mold in a sauna?
Indirectly, yes. Gaps in the vapor barrier let session moisture into the cold framing, where it condenses and feeds mold. A continuous, taped foil envelope plus proper ventilation keeps moisture out of the walls and lets the cabin dry between sessions.
Keep Building
With the envelope sealed, you are ready to line the wood and mount panels. Continue with best wood for a DIY sauna, installing DIY infrared panels, and ventilation, or step back to the full DIY infrared sauna guide and the cost breakdown.