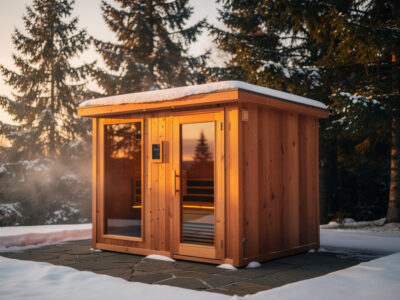
A backyard infrared sauna setup is the practical mid-step between a cabin order and a finished install — covering site selection, foundation, electrical routing, privacy screening, and seasonal considerations. Most setups require 2 to 4 weekends of prep work and $1,200 to $3,500 in materials beyond the cabin itself.
This guide walks through the full backyard installation process for a 2-3 person infrared cabin, the size that fits 90% of suburban yards. For broader buying considerations, the outdoor infrared sauna hub covers cabin selection and weather-rated specifications. For cabin recommendations specifically, see the 2026 best outdoor saunas roundup.
Picking the Right Spot in Your Yard
The ideal backyard sauna location is a level area within 40 feet of your electrical panel, at least 36 inches from any fence or structure, with afternoon shade and a natural privacy screen. Most yards have one or two viable spots and a half-dozen tempting ones that fail on either electrical access or drainage.
Walk your yard with a measuring tape and check four things at each candidate location: distance to the breaker panel (under 50 feet keeps wiring runs affordable), slope of the ground (under 2% over the cabin footprint), drainage during heavy rain (no standing water within 24 hours), and sightlines from neighbors’ upstairs windows. Eliminate any spot that fails on three of four — those are guaranteed regret zones.
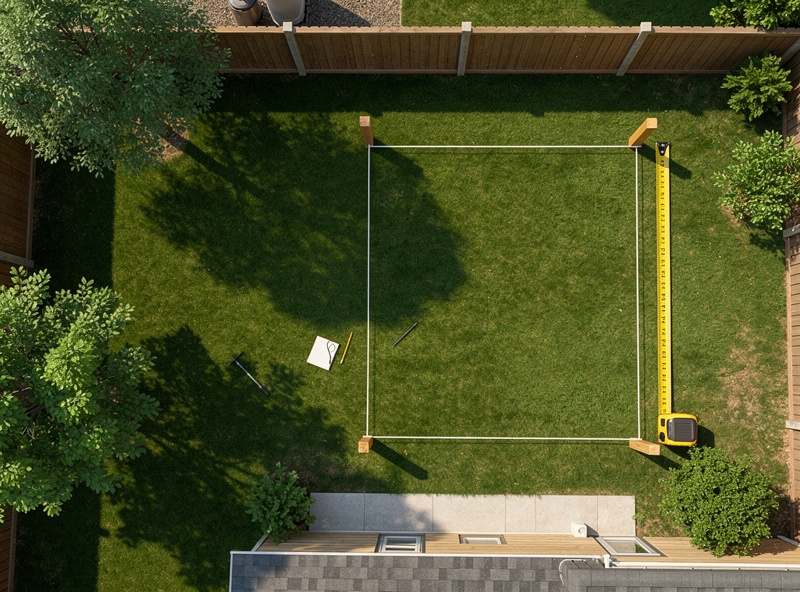
The 6-foot setback rule
Plan for 6 feet of clearance from the cabin door swing direction (typically the front), 24 inches on the back, and 18 inches on each side. This 9×6 footprint accommodates the cabin itself, the 4-foot door swing, plus enough access room for assembly, sealant maintenance, and heater repair. Many DIY builders try to save space by tucking the cabin against a fence — every annual maintenance cycle then becomes a multi-hour ordeal of moving the cabin away from the fence.
Site Prep: Clearing and Grading Before You Build
Before any foundation goes down, the ground needs to be cleared, leveled, and checked for buried utilities — skipping this step is the most common reason a “one weekend” foundation project turns into three. Budget a half-day for clearing and grading on a typical suburban lot, plus a mandatory call to your local utility-locate service before digging anything.
Start by calling 811 (the US national call-before-you-dig line) at least 2-3 business days before you break ground — it’s free, and it marks buried gas, electric, and irrigation lines so you don’t put a post hole through your own sprinkler main or, worse, a gas line. Once the site is marked clear, strip sod and topsoil down to undisturbed subgrade across the full pad footprint plus 6 inches of margin, then check level with a 4-foot bubble level or, on a larger pad, a laser level on a tripod. A rented plate compactor ($60-$90/day from most equipment rental counters) is worth it even on a small pad — hand-tamping alone rarely achieves the compaction needed to keep pavers or a slab from settling unevenly over the first two winters. On sloped yards, this is also the stage to decide whether you’re cutting into the grade or building a retaining edge; anything more than a 2-3% cross-slope usually needs a low retaining course of pavers or landscape timbers rather than trying to level pure fill.
Building the Foundation
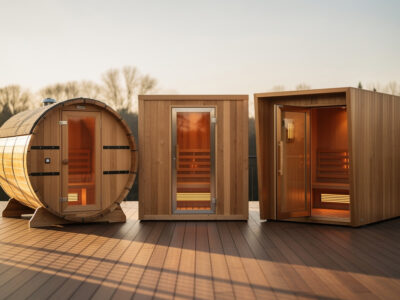
The foundation choice depends on cabin weight, drainage, and how permanent you want the install. For a 2-3 person sauna weighing 375-475 lbs dry, three foundation options dominate the backyard market: gravel pad, concrete pavers on sand, or a poured concrete slab. Most homeowners pick concrete pavers on sand because it costs $300-$700, takes one weekend, and lasts 20+ years.
| Foundation | DIY cost | Time | Lifespan | Best for |
|---|---|---|---|---|
| Compacted gravel pad | $150–$400 | 1 weekend | 10–15 years | Lightest cabins, dry climates |
| Concrete pavers on sand | $300–$700 | 1 weekend | 20+ years | Most 2–3 person cabins |
| Poured concrete slab | $800–$2,500 | 2 weekends + cure | 40+ years | 4-person cabins, premium installs |
| Existing composite deck | $0–$200 reinforcement | 1 day | Match deck rating | Decks rated for 60+ lbs/sq ft |
For the paver-on-sand approach, excavate 6 inches below grade, lay woven landscape fabric, fill with 4 inches of compacted 3/4-inch gravel, top with 1 inch of leveling sand, then set 24-inch concrete pavers in a grid pattern. Use a 4-foot bubble level across the surface — out-of-level installs cause the cabin door to misalign over time and the gasket to leak.
Running Electrical to the Cabin
Backyard electrical runs are where most projects exceed budget. Plan for $400 to $1,200 in materials and either a licensed electrician ($75-$120/hour, typically 4-8 hours of work) or a permitted DIY install if your jurisdiction allows it. The cabin manual specifies the circuit requirement — typically 20-amp 110V for 1-2 person cabins or 30-amp 240V for 3-4 person.
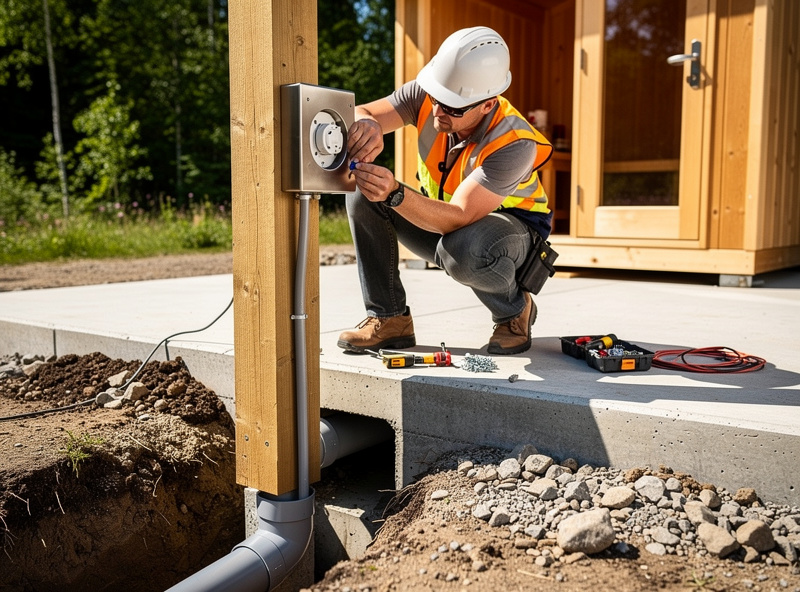
The standard run is from your main panel through 1-inch PVC conduit (Schedule 40 below grade, Schedule 80 above), buried 18 inches deep per NEC code, terminating in a weatherproof in-use receptacle on a treated 4×4 post within 6 feet of the cabin. Use 10-gauge THHN wire for 30-amp 240V, 12-gauge for 20-amp 110V. Always pull a permit — even DIY-allowed jurisdictions require an inspection before energizing.
Critical safety items per NEC 210.8(B): the receptacle must be GFCI-protected, the circuit must be dedicated (no other appliances on the breaker), and the receptacle must include an in-use weatherproof cover that closes around the plug. Skipping any of these is a fail at inspection. For broader installation context, our infrared sauna home setup guide covers the indoor electrical equivalent.
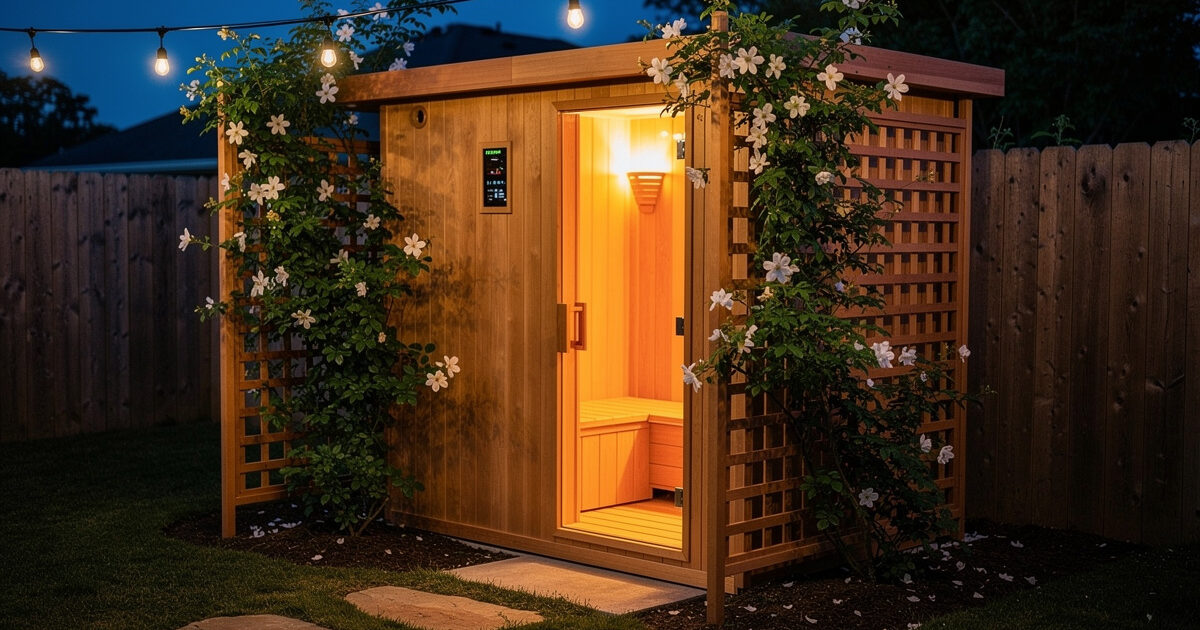
Privacy Screening Without Permits
Most jurisdictions allow privacy screening up to 6 feet tall in the backyard without a permit, but anything attached to a structure (the sauna or your house) typically needs a permit. The cleanest privacy approach is freestanding lattice or slatted cedar screens set 4 feet from the cabin on the neighbor-facing sides.
Three approaches that work well in suburban yards:
- Western Red Cedar slat panels: 6×4 ft prefab panels at $180-$280 each, mounted to 4×4 cedar posts on stakes or in concrete footings. Visually matches a cedar cabin and requires no permit.
- Bamboo roll screening: $30-$80 per 6×8 ft roll, attached to existing fence posts or freestanding bamboo poles. Quickest install (under 2 hours) but only lasts 4-6 years outdoors.
- Privacy plantings: Italian Cypress, arborvitae, or climbing jasmine on a trellis. Slowest privacy build (2-4 years to full screening) but adds permanent property value and zero maintenance after year 5.
Avoid solid wood fence panels directly behind the cabin — they trap heat and reduce ventilation around the heater exhaust grilles, which shortens heater life by 18-24 months in our experience reviewing field installs.
Drainage and Waterproofing the Pad Area
Water pooling near the cabin foundation is the #1 cause of premature wood rot in backyard sauna installs. Slope the pad away from the cabin at 1.5% grade (about 3/4 inch drop per 4 feet), and route runoff to a French drain or gravel trench on the downhill side.
For yards with clay-heavy soil or low spots, a basic French drain is worth the extra weekend: dig a 12-inch trench downhill of the pad, line with landscape fabric, lay a perforated 4-inch corrugated drain pipe, fill with 3/4-inch gravel, and fold the fabric back over the top. Expect $120-$200 in materials for a 20-foot drain. Skipping this in a low-drainage yard is the difference between a cabin lasting 18 years versus 8 years.
Lighting and Pathway Access
Walking out to the sauna at 6am in January is part of the year-round experience, and unlit backyard pathways become an injury risk on icy or wet ground. Plan for low-voltage path lighting on the route from your back door to the cabin, plus a motion-activated entry light at the cabin door.
The simplest setup is a 12V LED path lighting kit ($80-$200 from Hampton Bay or Volt) on a transformer plugged into the cabin’s GFCI receptacle. Six 1-watt path lights spaced 8 feet apart cover a typical 40-foot backyard run. For the cabin door light, a hardwired 60W-equivalent LED with motion sensor ($45-$120) avoids the fumbling-with-keys-in-the-dark problem.

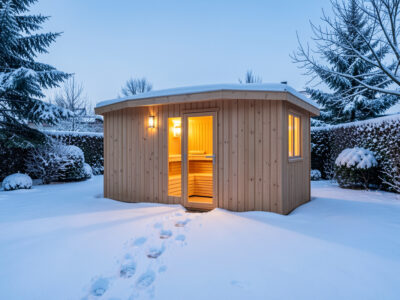
Seasonal Considerations and Year-Round Use
Backyard saunas operate year-round in any climate down to -22°F, but the experience differs significantly by season. Winter sessions take 25-35 minutes to reach 130°F versus 12-18 minutes in summer, electricity cost rises about 35%, and snow management becomes a regular task. Year-round use is straightforward if you plan for it; seasonal use requires a winterization routine.
For owners who use the cabin year-round (recommended for cabin longevity), the additional infrastructure investment is minimal: a snow shovel kept in the cabin’s storage shelf, a heated outdoor mat at the door ($60-$140), and a 25-watt heat trace cable on the door gasket if you live in a freeze-thaw climate ($30 plus install). Total winterization budget: under $250 one-time.
For seasonal use only (May–October), drain any optional water features in late September, run a 30-minute dehumidify cycle, vacuum heater grilles, and cover the cabin with a breathable canvas cover. Always store the cover bone-dry — wet covers in storage generate mildew that transfers to the cabin shell when reinstalled. For year-round protection beyond covers — UV-resistant stains, sealant cycles, and joinery upkeep — see our exterior infrared sauna weatherproofing guide. The session protocol after winter unboxing should match the safety guidance in our infrared sauna safety guide, including a slower 60-minute initial warmup to verify all electrical and heater functionality before normal sessions.
Cold Climate and Year-Round Performance
Outdoor infrared cabins in cold climates face a specific challenge: the heaters work harder to maintain session temperature when ambient drops below 40°F. On my own unit, panel surface temperature at 0°C ambient runs about 8°C cooler than at 20°C ambient at the same wattage setting — meaning a 130°F target feels more like 120°F in January. The practical fix is either a higher-wattage cabin (oversized heaters that compensate for thermal loss) or a pre-heat extension: 30 minutes instead of 15 when the ambient is near freezing.
For Swedish winters I run my cabin in an insulated garage rather than truly outdoors, which solves most of the thermal-loss problem. Truly outdoor installations benefit from the exterior weatherproofing guide and the cold climate performance breakdown of how panels behave below freezing.
Permits, Codes, and Inspections: What You Actually Need
The cabin itself almost never needs a building permit — most jurisdictions treat it as movable property, the same category as a hot tub or a shed under a certain size threshold. The electrical circuit feeding it almost always does, and skipping that permit is the one shortcut that comes back to bite you at resale, when a home inspector flags unpermitted work.
The practical sequence: check your local setback rules first (how close a structure or fixture can sit to a property line — commonly 3-10 feet depending on municipality), then confirm whether your lot size or a shed-equivalent size threshold triggers a structure permit even for a “movable” cabin — some jurisdictions draw that line at a specific square footage. Pull the electrical permit before the electrician starts, not after; most inspectors want to see conduit and rough wiring before it’s buried or covered, which means scheduling the inspection mid-project, not at the end. HOA covenants are a separate layer entirely from municipal code and can be stricter — some require pre-approval for anything visible from the street or an adjacent yard, including a sauna cabin and its privacy screening. For the full paperwork sequence, subpanel sizing math, and a jurisdiction-by-jurisdiction rundown of what typically triggers a permit, see our dedicated outdoor sauna foundation, power, and permits guide.
Frequently Asked Questions
How much yard space do I need for a backyard infrared sauna?
Plan for at least 9 feet by 6 feet of usable space for a 2-3 person cabin. This includes the cabin footprint (4×5 ft), 4 feet of door-swing clearance in front, 24 inches behind, and 18 inches on each side for assembly and maintenance access.
Do I need a permit to put a sauna in my backyard?
In most US municipalities, the cabin itself does not need a permit because it is treated as movable property like a hot tub. The electrical circuit always needs a permit ($75-$200 typically). HOAs and historic districts may have additional restrictions — call your county building department before ordering.
What is the best foundation for a backyard sauna?
For 2-3 person cabins, concrete pavers on a compacted sand-and-gravel base is the sweet spot at $300-$700 and 20+ year lifespan. For 4-person cabins, a 4-inch poured concrete slab with rebar is the professional standard. Compacted gravel works only for the smallest cabins in dry climates.
How far from my house should the sauna be?
Minimum 36 inches from any wall for code compliance and ventilation, but 6-10 feet is more practical for fire safety, electrical accessibility, and noise insulation. Most homeowners place the cabin in a yard corner 15-30 feet from the back door, balancing privacy with cold-weather walk distance.
Can I put a sauna directly on grass or dirt?
No. Even pressure-treated frame lumber rots within 5-7 years in direct ground contact. Always use a foundation with a moisture barrier — at minimum a gravel pad with landscape fabric, or better, concrete pavers or a poured slab. Direct-on-grass installs void most cabin warranties.
How much does it cost to add electrical to a backyard sauna?
Budget $400-$1,200 for materials and $300-$960 for licensed labor on a 40-foot run from your panel. The total typically lands at $700-$1,500 for a permitted 20-amp 110V or 30-amp 240V dedicated circuit including the GFCI receptacle and weatherproof in-use cover.
Will my backyard sauna bother my neighbors?
Infrared saunas operate near-silent — heater fans run under 35 dB at 6 feet, quieter than a refrigerator. The privacy concern is visual rather than acoustic. A 6-foot cedar screen or evergreen plantings on neighbor-facing sides solves this for under $400 in materials.
Related Articles
- Outdoor Infrared Sauna Setup Guide — the parent hub on cabin selection and specs
- Best Outdoor Infrared Saunas 2026 — top 7 cabins ranked
- How to Set Up an Infrared Sauna at Home — indoor installation comparison
- How to Choose the Best Infrared Sauna — buying framework
- Sun Home Saunas Review — premium outdoor brand profile